Now booking for Spring 2025 – Call 1-833-410-4357 or Book Online!

According to one report, seniors will make up to 25% of the total population of Canada by 2030. This means the rapidly growing senior population in Canada needs essential support services to meet their needs. While the younger population has access to a number of facilities and resources to manage day-to-day tasks, seniors need a little extra support to live comfortably. The main focus of these most requested support services for the elderly is to assist seniors and give them resources to maintain their status and quality of life. These services allow senior citizens to stay as healthy and independent as possible. When it comes to available support services in Canada for seniors, there are quite a few services that cover various aspects of life. The primary support services include personal support, household maintenance, transportation assistance, and accessibility modification. However, the most requested service that reflects particular challenges seniors face on a daily out is housekeeping and property maintenance. Therefore, in the article below, we will briefly discuss the primary support services and how they help seniors maintain their independence. We will also walk you through what makes household and property maintenance services the most requested one in Canada. To learn about them in detail, keep on reading. The Most Requested Service for the Elderly: Housekeeping & Property Maintenance As people age, they prefer to “age in place,” meaning they want to live the rest of their lives in their own homes instead of moving to an old age home. However, one of the biggest challenges they face is carrying out the simplest of daily tasks, such as cleaning the gutter, cutting grass, painting the walls, or repairing the fence. In this regard, housekeeping and property maintenance is the most requested support service in Canada. According to one report, about 26.8% of seniors in Canada need assistance with their daily tasks, yet they still need to receive essential support. Fortunately, seniors can access household maintenance services that can help them carry out and complete these daily tasks with compassion and ease. In Canada, popular household and property maintenance services like Custodia go above and beyond just basic dusting and cleaning. With their compassionate and highly dedicated team, they completely understand the care seniors require and offer their support to complete their everyday tasks for them with professionalism. While there are hundreds of other housekeeping services available across Canada, choosing the one that focuses on caring for seniors is extremely important as they are well versed in understanding their needs to provide the support they deserve. Services like Custodia will not only mow your lawn but also create a thorough senior support home management plan for seniors to live longer and happier lives at home. Overall, these housekeeping and property maintenance services will take care of all the household predictable tasks that you find challenging to carry out and complete. They will make sure to provide support to people or seniors with physical disabilities, medical conditions, and limited mobility to ensure you feel comfortable and safe in your home. Benefits of Housekeeping and Property Maintenance for Seniors The demand for housekeeping and property maintenance services reflects how important it is for seniors to maintain safety, independence, and quality of life so they can “age in place.” This demand has made both private and government institutes come up with programs that address this specific challenge in seniors’ lives. With their effort, this particular support service has started to be widely available across Canada, offering these benefits: Overview of Other Essential Senior Support Services in Canada With the rapidly growing senior population in Canada, both government and non-government institutes have introduced a number of other support services for seniors. These services address certain challenges they face on a day-to-day basis to encourage them to live a healthy and happy life. With these services available, seniors have the support they deserve to live a happy and safe life. Let’s discuss these services briefly: Transportation Assistance Growing older doesn’t mean you have to stay indoors and stop driving altogether. Staying mobile and getting around for seniors is extremely important to maintain independence and an outgoing lifestyle. However, as you age, limited mobility, physical disabilities, and health conditions tend to change your driving habits, and inevitable challenges come with accessing traditional public transportation. Therefore, there are quite a few transportation assistance options available to assist seniors in getting around Canada. For instance, for seniors who are unable to access public or private transportation, organizations like the Canadian Red Cross or CHATS provide transportation. Using these free or volunteer driver services, seniors can attend their medical appointments, go out shopping, or attend social gatherings. These transportation assistance services make it possible for seniors to get around easily and go about their daily tasks. Social and Recreational Support Living alone all by yourself can feel isolated and sad, but the good news is that you do not have to feel that way at all. There is no age limit for having a vibrant social life and recreational support. In fact, being socially connected with your community is extremely important for staying active and keeping your overall well-being in check. As they say, the key to a long life is a happy life. So, seeking social and recreational support offers you a life you may be missing by just sitting alone at your home by yourself. To address this concern, there are quite a few municipalities across Canada that offer several programs specifically designed for seniors. Programs like Ontario Parks and Seniors Active Living Centres (SALCs) usually consist of community outings, social gatherings, fitness classes, art sessions, and more. These programs not only promote better health but also help foster new friendships that combat isolation. Health and Personal Care Services Health and personal care services are just as important as housekeeping services to provide necessary support to the senior population. In Canada, the healthcare system ensures seniors receive medical support, rehabilitation, and caregiver assistance to improve their quality…
Read more

How to install the windows with a step by step process? Windows are not just functional; they add character, elegance, and value to any home. In Ontario, choosing the right steps of windows installation can transform the appearance of a property, making it more inviting and attractive. When homeowners invest in high-quality windows, they enjoy benefits that go beyond aesthetics. Properly selected windows provide security, protect against harsh weather, and can even enhance the energy efficiency of a home. Whether you’re building a new house or replacing old, drafty windows, the installation process plays a crucial role in achieving the desired results. But what exactly are the steps involved in installing windows? What is the average cost of new window installation in Ontario, and which factors affect pricing? These are common questions seniors and homeowners in Ontario ask. Several elements influence the cost, such as the choice of materials, labor, and customization needs. Understanding these ensures homeowners get the most value out of their investment. When choosing the best windows for your property, several factors must be considered. The architectural style of your home, the type of building, and even local weather conditions can affect the decision. For example, older Victorian homes may benefit from classic wooden frames, while modern designs often favor sleek aluminum or vinyl options. But selecting the right windows is just the first step. Ensuring that they are professionally installed is equally important. Poor installation can lead to drafts, water leaks, and even structural damage, turning a good investment into a potential eyesore. Understanding the costs associated with window installation is vital for homeowners. Costs can vary based on window type, installation complexity, and additional services like trim work or disposal of old materials. The goal of this guide is to answer the most common questions about window installation in Ontario and help you make informed decisions. We aim to provide insights into the installation process, highlight factors affecting costs, and share practical tips on choosing the best windows for your home. Don’t hesitate to explore our competitive home management pricing and special discounts, especially for seniors and those bundling services. For a free consultation and quote, contact us today at 1-833-410-4357 or book online. Let’s dive into the details and get you one step closer to upgrading your home’s windows. What Are the 7 Signs That I Need to Replace My Windows in Ontario? Replacing windows at the right time can improve your home’s comfort, energy efficiency, and curb appeal. Here are seven signs that indicate it might be time for new windows: 1. Drafts and Air Leaks If you feel drafts or notice air leaks around your windows, it means they aren’t sealing properly, which can increase your energy bills. 2. Visible Damage or Decay Rotting, warping, or cracked window frames are clear signs of deterioration. Damaged windows not only look unsightly but also compromise insulation and structural integrity. 3. Condensation or Fog Between Glass Panes When you see condensation inside double- or triple-pane windows, it indicates a broken seal, reducing the window’s energy efficiency. 4. Difficulty Opening, Closing, or Locking Windows Windows that are hard to operate or don’t lock securely may be warped or have hardware issues. This can affect both security and functionality. 5. High Energy Bills If your energy costs are consistently rising, inefficient windows could be to blame. Replacing old windows with energy-efficient models can help reduce heating and cooling expenses. 6. Increased Noise from Outside If you hear more outside noise than usual, it means your windows aren’t providing adequate sound insulation, which could be due to aging or single-pane glass. 7. Outdated Appearance Older windows can make your home look dated. Newer styles can enhance the look of your home and increase its resale value. (Read more about Is Window Cleaning Worth It?) What Are the Steps Involved in Window Installation in Ontario? Installing windows in your Ontario home involves multiple stages that must be done correctly to ensure the best results. Each step plays a crucial role in improving energy efficiency, security, and aesthetics. Homeowners who understand the process are better equipped to make informed decisions about hiring professionals, selecting materials, and budgeting for the project. Here’s a breakdown of the window installation procedure, with each phase explained in detail. 1. Preparation Before Installation Proper preparation is essential for a smooth installation. It starts with assessing the space and selecting suitable window options. This phase ensures that the new windows fit perfectly and meet the desired energy efficiency standards. Measuring the Window Openings Accurate measurements are crucial to prevent gaps and leaks. Measurements should account for the height, width, and depth of the window frame. Professionals use precise tools and techniques to avoid errors. Selecting the Right Type of Windows Consider the window material, style, and energy efficiency. Vinyl, wood, and aluminum windows each have unique benefits. Energy-efficient options help reduce heating costs, especially in Ontario’s cold winters. Obtaining Necessary Permits Certain installations may require permits depending on the building code in your area. Ensure you check local regulations and obtain any required permits before starting. 2. The Installation Process This stage involves physically removing the old windows and installing the new ones. Each step ensures the window fits securely and performs optimally. Removing the Old Windows The existing windows must be carefully detached without damaging the surrounding structure. This may involve removing screws, nails, and old caulking. Installing the New Windows Place the new window into the opening, ensuring it is level and secure. Shims may be used to adjust for a perfect fit. Once in place, the window is fastened to the frame. Sealing and Insulating Around the Frames Proper sealing prevents air and water leaks. Insulation foam or caulk is applied around the edges to create a tight seal, improving energy efficiency. 3. Post-Installation Checks After installation, inspections and finishing touches ensure everything is in order. This stage is vital for long-term performance. Ensuring Proper Functionality of Windows Test the windows by…
Read more
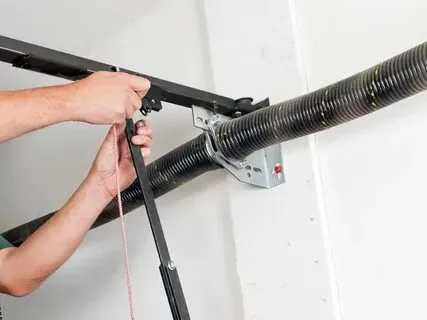
Garage door springs are the most important yet overlooked component of any garage in Ontario. Many people believe that once you install them, they will work just fine until they do not. However, one thing you need to be aware of is that you can actually extend their lifespan with regular maintenance and checks. Nevertheless, if that is not an option anymore and your garage door has started to show signs of wear and tear, such as partial opening, banging noise, visible gaps, and crooked doors. It is about time you replace the broken springs. Much like any other part of your outside home management plan, choosing the correct garage door springs can be tricky, especially if you are replacing the springs for the first time. Door size, weight, wire size, type of spring, and other factors play a huge role in determining which garage door spring is best for your garage door. In this article below, we will discuss all you need to know to buy a garage door spring in Ontario. From discussing the type of garage door spring to learning about other important factors, we will cover different aspects so you can make an informed choice. 2 Types of Garage Door Springs to Buy in Ontario The springs are an essential component of any garage door as they ensure smooth and safe functioning. They help manage the weight of the door and allow it to lift and lower down without any problem. So, when it comes to choosing the garage door spring, there are two main types of springs that you can choose from, i.e., Torsion and extension. If you are not thinking of replacing the whole garage door, you must select the one you have already installed. Let’s learn about these springs and their function in garage doors. Torsion Springs Torsion springs are the most common type of garage door spring. They are primarily used in residential garage projects as they are durable, operate smoothly, and do not easily damage other garage door parts. Since these springs can manage more weight, you will also see them in commercial projects as well. For most residential garage doors, there are one or two visible springs responsible for managing the weight. However, depending on the size and weight, some doors may require up to four springs to handle weight. These springs are installed horizontally just above the sectional garage door to provide smooth lifting and closing of the door. They are tightly coiled on the metal shaft and are constantly under extreme amounts of tension. Simply put, torsion springs work by storing mechanical energy, which is equally distributed across the metal or torsion shaft to open and close the door. When the garage door opens, the spring begins to twist on the shaft along with the attached cable, and the tension on the torsion spring lifts the door. Similarly, when the door closes, the same spring twists in the opposite direction to increase the tension or get back into a loaded “torsioned” state. Typically, torsion springs come in a few different types, such as standard torsion springs, early set torsion springs, steel rolling door torsion springs, and torque master torsion springs. All these types are used in both residential and commercial garages depending on the need. Extension Springs As the name suggests, extension springs run parallel to each side of the garage doors and store energy by expanding and contracting. These types of springs are usually found on older and smaller garage doors in garages with lower ceilings. They are further categorized into three different types: open-looped end, double-loop end, and clipped end. However, you will not find them in modern garages because they are less durable and less smooth compared to torsion springs. Also, they are only used in residential properties as they have a lower capacity for handling weight and load than torsion springs. When it comes to the cost, they are a more affordable option compared to torsion springs. Extension springs work by stretching and extending, and there is at least one spring on each side of the door. So, when the door closes, the spring fully stretches, adding tension to the weight of the door. Though the springs on both sides of the garage door operate independently, they must share the weight of the door equally for it to operate correctly. However, one of the downfalls of using these springs in the garage door is that they may break when fully stretched, which can be dangerous. Therefore, extension springs must also have safety cables attached to them in case the springs break. If the springs are not working in harmony, the uneven opening and closing of the door can add stress to the tracks, therefore requiring you to buy a new one. In summary, after thousands of opening and closing cycles, both types of garage door springs will eventually lose their resiliency. When it happens, it is better to buy a new garage door spring so that the door continuously works smoothly and safely. Factors to Consider When Choosing a Garage Door Spring Now that you have learned about both torsion and extension springs in detail, let’s discuss how the door’s weight, size, wind direction, and other factors come into play. Considering these factors below will eventually help you decide which garage door springs you should buy: Garage Door Weight and Size The garage door weight and size are two of the most important factors to consider when choosing door springs. Just like discussed earlier, torsion springs offer excellent durability and functionality to large doors that are also heavier. These springs are used in garages for both residential and commercial properties as they can effectively handle weight when opening and closing doors. In contrast, smaller doors with less weight can benefit from extension springs. To learn which one works best for you, use a bathroom scale to weigh the door and consult a spring selection chart. With the correct height, weight, and size, you…
Read more
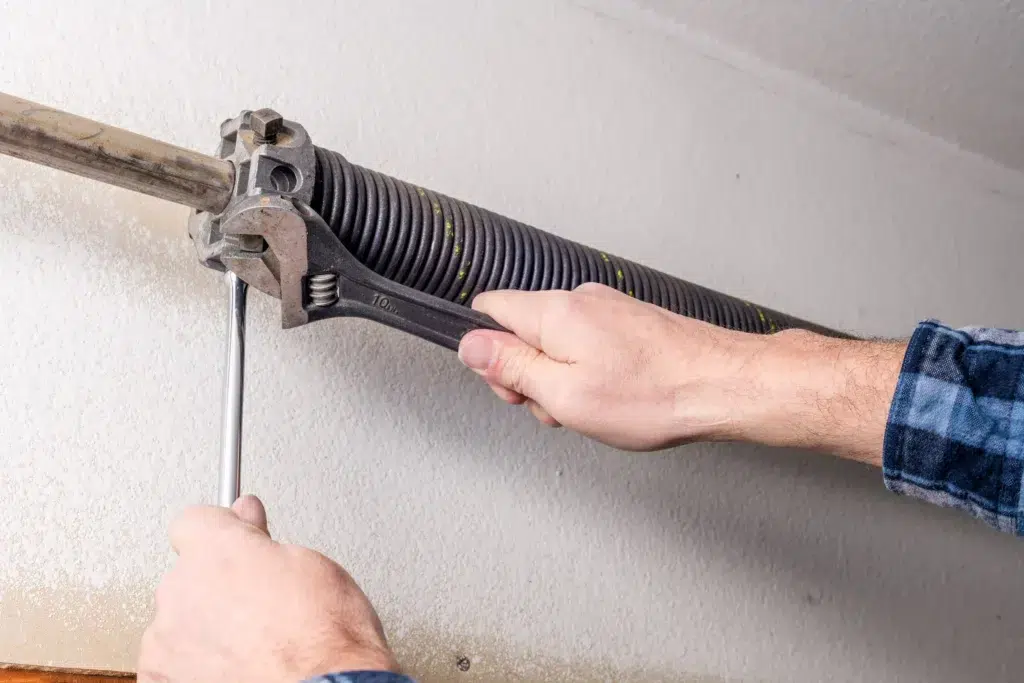
Garage door springs are the most crucial component of any garage door. However, they are also the most overlooked by the homeowners. This is because most people pay attention to the areas that are primarily visible and can impact the appearance of the house. While garage door springs may not look aesthetically appealing, keeping them in good shape is essential to ensure proper garage door functioning and your safety. So, if you were delaying the replacement project, thinking it would take days to complete, you are in for a surprise. Unlike other home improvement projects, garage door spring replacement only takes about a couple of hours if done by a pro. In the post below, we will explore some of the most common signs that indicate your garage door springs need your attention. We will also discuss how much and how long it can take to replace the broken springs. So, let’s get into the details. 5 Common Signs of Failing Garage Door Springs Over time, garage door springs tend to lose their durability, functionality, and smoothness, causing them to break or fail. Whether the door is partially opening or runs very fast on the way down, it can be a serious safety problem that must be addressed before any injury or vehicle damage. This is when the springs must be replaced with the new ones. However, many homeowners need help to distinguish between adequately functioning and damaged garage door springs. If you are finding it difficult as well, here are some common signs you must look out for. So, replace your garage door springs if: Garage Door Only Opening Partially If your garage door stops abruptly halfway, the problem might lie within the springs. Partially opened garage doors can be a clear indication of broken or worn-out garage door springs. The springs are responsible for providing the tension needed to lift the door and manage its weight effectively. Over time, they may lose their elasticity, resulting in operational issues. Due to this, the door not only struggles to open and close, but it may also pose a safety danger that should be addressed immediately. Visible Gap in the Springs The purpose of the springs is to expand and contract with the closing and opening of the door. Over the years, the constant tension in the springs can cause them to elongate, leading to visible gaps in the spring coil. The break in tension and visible gaps in the springs means they are failing and need to be replaced before any severe damage to the vehicle or injury. Garage Door Feels Heavy When you open or close the door, it feels cumbersome, which means the garage door springs are no longer supporting the weight as they should. If the springs fail to manage the door weight, the entire weight rests on the person lifting or closing the door. If you also feel that the door is heavy, be sure to check the condition of the sprigs and replace them immediately. Loud Banging Sound Whenever you try to close the garage door, and it sprints on the way down, this indicates the springs have broken. When this happens, it usually causes a loud banging sound because springs release the energy all at once. If you hear a banging sound or noise, your garage door needs a few repairs before you try to use it again. Crooked Door Garage doors usually have two springs working independently to share the weight of the door. This makes sure that the door opens and closes smoothly without any problem. However, when one of the springs starts to fail, the door is supported unevenly, causing it to appear crooked or unbalanced. To fix the issue, you must replace both garage door springs to ensure you are not facing any mechanical problems in the future. These are some of the most common signs of a failing garage door springs. Suppose you notice any of these signs or other unusual signs. In that case, you must consult with professionals such as Custodia, who specializes in these home improvement projects, to replace a garage door spring on time. Cost & Time Estimates to Replace a Garage Door Springs for Ontario In Ontario, the cost of replacing a garage door spring includes both labor and material costs. Depending on the spring you want to replace, the cost and time of the installation may vary. For torsion springs, the parts and materials can cost you anywhere between CAD 120 and CAD 350 for Ontario. At the same time, the installation cost could be around CAD 100 to CAD 250 per hour. The overall project cost can range from CAD 550 to CAD 1,100 and can take around 2-4 hours, depending on the type and size of the door. For extension spring replacement, the prices are much lower for both the material and replacement cost. The total project could cost you CAD 270 to CAD 620, depending on where you live and the complexity of the replacement. When it comes to service time, it only takes approximately 1-2 hours to complete the job. Tips for Maintaining Garage Door Springs While replacing the worn-out garage door springs is the only solution to ensure you keep using the garage without any safety hazards, maintaining the springs regularly can also extend their lifespan. This is important as most homeowners tend to delay the replacement and maintenance of the springs, thinking they still have time. However, the break usually happens all of a sudden, giving you very little time to look for a solution. In fact, many times, it can cause vehicle damage or a severe safety issue. So, to stay out of this situation, here are a few safety measures and maintenance tips to follow: 1. Visual Inspection Regular visual inspection of your garage door and its components, such as hinges and springs, to ensure it stays in good shape for years. No, you do not have to check the components every other week.…
Read more
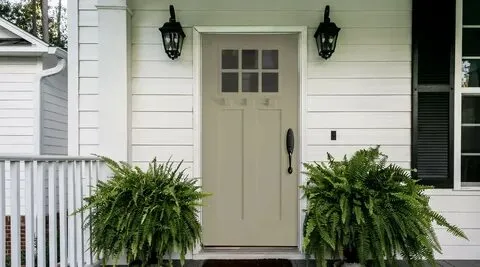
Replacing a front door? Well, this is one of the most exciting home improvement projects to start. The Front of your house is much more than an entryway. It protects your house from harsh environmental and external elements throughout the year. So, it is only fair to invest accordingly. However, have you ever wondered what will be the cost of replacing just one front door of the house? Or how much should I pay for a new front door in Ontario? Apart from buying the door itself, which is not cheap, other factors such as labor fees, installation costs, and hardware costs should also be considered. In the post below, we will explore everything you should know before starting this home improvement project and why it should be a good idea to replace your old door in Ontario. We will also discuss how you can buy the door based on your budget. So, let’s dive in. Factors Affecting New Front Door Costs Starting shopping for a front door without determining a budget does not make sense. Whether you want to go for a solid wood entry door or steel entry door, knowing your budget is important to make the choice accordingly. While there are a lot of options available in the market, not all work for your home improvement project. Plus, when choosing a front door, there are many factors that can affect the cost of new door installation. Understanding these factors before making a choice will help you with budgeting and planning. Let’s cover different factors influencing the cost of installing a new door. 1. Material Selection When it comes to choosing the front door, there is no such thing as one size fits all. Exterior doors are available in different materials, such as screen doors, metal or wooden ones; and they all come with different price tags. Based on your budget and requirements, you can pick any door from the cheapest to the most expensive. The average front door cost across Canada is CAD 2,500, where the most basic door can cost you CAD 1,500, and the more upscale exterior doors usually come to around CAD 5,000. However, whatever choice you make, be sure to choose the material that suits the weather conditions in Ontario. The most common and popular materials include wood, steel, and fiberglass. Wood doors are the most popular choice in Canada as they offer timeless elegance, excellent durability, and increase the energy efficiency of the house. Ontario experiences harsh, freezing, and snowy winters. In this regard, front doors made with solid wood offer natural insulation that can keep out cold winds in winter. Plus, you can customize the door to fit your home design as well. The wood door could cost you anywhere between CAD 600 and CAD 2,000, depending on the region you live in. However, solid wood doors do require regular maintenance compared to other materials. If you are looking for a low-maintenance and cost-effective option, a steel front door might be the right pick, as it costs between CAD 500 and CAD 1,500. Just like wood doors, steel doors offer outstanding durability, energy efficiency, and security, making them a reliable option. Many modern homes are now built with steel doors as they improve home security and can withstand extreme weather and environmental conditions. Plus, they come in numerous styles, designs, and finishes, allowing you to customize them according to your home aesthetics. However, the only downfall is that they can dent or scratch, which is one thing you must consider if you have pets at home. Fiberglass front doors are highly durable, energy-efficient, and low maintenance compared to wood doors. Unlike wood front doors, they dont shrink, warp, or swell with temperature fluctuations. With the price tag ranging from CAD 800 to CAD 1,800, these doors are a cost-effective option compared to more upscale exterior doors available in the market. Additionally, the foam core of these doors offers excellent insulation that can keep your house warm in winter and cool in summer, lowering energy bills. 2. Door Size and Style Door size and style are often selected based on the current door size and the home’s architectural design, and they will obviously affect the cost. It is important to consider that the bigger the entry door, the more it will cost. When it comes to size or type of front door, they usually fall into one of these categories: single door, double door, single door with one sidelight, single door with two sidelights, and double door with two sidelights. A single door is the most affordable option, and then comes a single door with one side light and a single door with two sidelights. Similarly, double door and double door with two side lights will cost you more than just single door options. Moreover, the thickness, height, and width of the front door will also determine the cost of the new door installation. However, make sure to purchase your door from a reliable company like Custodia to get a warranty as well. When it comes to the style of the front door, it can significantly impact the cost. For instance, the cost of a simple solid wood front door would be much less than the one with a complex design and details. Many people choose to add custom elements on the front door that go well with the ongoing design theme. Plus, adding decorative glass features and intricate designs, as well as choosing high-end wood material, will really increase the project’s overall cost. If this is something you would love to spend your money on, the possibilities are limitless when it comes to adding custom design elements to the project. 3. Security Features If you are thinking of upgrading the front door of your house, it should come with certain security features that not only protect you against intrusion but also increase the curb appeal of the property. Many homes in Canada were built with 30-year-old front doors that did…
Read more

Installing a fence on your commercial or residential property serves many great purposes. From keeping out trespassers to defining the boundary of the property and from improving privacy to keeping your pets and children safe, the fence is a great way to enhance the curb appeal of your property. However, many property owners need to pay more attention to the regular upkeep of these fence posts, resulting in broken and damaged posts over time. This not only decreases the property value but also kills their primary purpose of providing a physical barrier. If this is the case and you want to learn if you can fix the issue yourself, the answer is yes. In this post below, we will walk you through a few common causes and signs for broken fence posts. We will also learn how you can quickly fix fence posts following a few simple instructions. So, if you are interested, keep on reading. 4 Key Causes and Signs of Fence Post Damage Before you even start fixing the broken and warped fence post, it is essential to understand the signs of the damage and the specific type of damage you are fixing. Knowing this will help you find the best solution. Plus, you will be able to determine whether the issue can be fixed with a simple repair, or you will have to go for a complete post replacement. Property owners often need help to tell the difference between the issues that can be easily repaired and the fence problems that require complete replacement. Due to extreme environmental and weather conditions in Ontario, fence posts are vulnerable to a number of damages. The most common ones include leaning posts, corrosion, rotting, and cracking and splitting fences. Let’s understand the causes and signs of fence post damage in detail. 1. Corrosion Corrosion usually happens when metal posts are exposed to environmental elements such as moisture and oxygen. The chemical reaction between the metal and the oxygen in the air, when exposed to moisture, results in oxidation, leading to rusting. Whether you have a sprinkler system directed towards the base of the post or the soil is wet all the time, it can cause the metal to deteriorate. Hence, this weakens the metal structure over time, and the fence loses its stability. In this case, you should remove the rust using a wire brush and apply rust-resistant primer and paint afterward. Moreover, applying rust inhibitor or sealant on the defective areas can also resist corrosion and increase the lifespan of your fence post. 2. Rotting Wood In Ontario, rotting wood is one of the primary causes of damaged and broken fence posts. It usually happens in wooden fence posts, which makes the wood soft, spongy, crumbly, and discolored. Since wooden posts are buried in the soil, prolonged exposure to moisture in the base area promotes bacteria and fungi growth. These microorganisms then feed on the wood fibers and cause them to break, leading to decay and rotting in the posts. Read more about Can A Rotten Fence Post Be Repaired In Ontario? The good news is that even the rotting wood can be saved with a few necessary repairs. However, it is important to know that if the rot damage is below 30%, you can repair it. To do so, you can use a repair kit or use pressure-treated wood with preservatives to avoid rotting. If the rotting has taken over the entire fence, it is best to replace it before it gets to other posts. 3. Leaning Fences If the post is wobbly when you share it, that’s when you know the wood has started to decay from the base. If you notice any leaning fences, know that the base of the post has been compromised. This usually happens due to excessive moisture accumulating in the area, resulting in unstable and unsound posts. Leaning fence posts can be a result of shifting soil, poor fence installation, and extreme weather conditions like heavy rain and strong winds. These issues can cause fence posts to weaken and lean, resulting in an unstable base. To fix fence, you can use steel braces to secure the base or reinforce it with concrete. If the damage is beyond simple fixing, replacing the fences with a new one is the right solution. 4. Cracking and Splitting Lastly, the visible cracking and splitting of the wooden fence post is a clear indication of damaged fence posts. This typically happens due to the temperature changes and humidity, leading to the contraction and expansion of the wood fibers of the fence posts. In Ontario, where fluctuating weather is one of the biggest concerns, cracks can damage your fences, reducing the structural integrity of the entire post. Fortunately, you can repair small cracks using a wood filler and apply sealant or wood stain to prevent the moisture from damaging the wood further. Additionally, placing caps on the fence ensures moisture does not seep into the wood, minimizing the chance of wood splitting. However, if the damage cannot be fixed with a wood filler and a cap, you must replace the damaged fence post with a new one. Step-by-Step Process of Fixing a Broken Fence Post Now that you are aware of the causes and signs of the damage, you will be able to fix the broken fence post more efficiently. To help you do that, here is a step-by-step guide to repair the damaged fence post. Follow these steps, and you will be able to get the job done like a pro: 1. Evaluate the Damage First things first, every fixing project starts with evaluating the damage. In most cases, minor repairs and wood filling can fix fence posts. So, you need to check if the breaks are minor and can be fixed easily. If there is significant rot and damage, you will need to upgrade the fences. 2. Gather Materials and Tools After making sure you can repair the damage yourself, you must gather all the…
Read more

Screen doors not only look aesthetically pleasing, but they also serve the great purpose of keeping debris, dust, insects, and bugs out of your home. Plus, they play a huge role in regulating indoor temperature and keeping your home nice and comfortable for you. So, whether your pets have damaged the mesh on the screen doors or it is just old and clogged, replacing it yourself is straightforward. So, grab your tools and follow this guide to upgrade the mesh on the screen doors. 6 Common Reasons to Replace the Mesh? If your screen door has been serving its purpose for years, it has started to show signs of wear and tear. However, usually, it’s the mesh that gets damaged, and the actual door frame is still in good condition. Subsequently, if you notice any damage, it is about time to replace or repair the mesh. Here are a few common reasons why you should replace the mesh: 1. Visible Tears or Holes Due to regular usage, extreme weather conditions in Ontario, and even sharp nails of pets, screen door mesh can develop holes and tears. The mesh tends to get damaged when exposed to these elements. This means the door is no longer serving its purpose of keeping bugs, debris, and cold air out of the house. In this situation, if you are thinking of just patching the holes, this is not the long-term solution. Plus, you will end up replacing the whole mesh anyway. So, it is better to replace the mesh on the screen door on time to avoid extra work. 2. Rust on the Frame Rush is a visible sign of a damaged mesh on a screen door. Over time, due to continuous exposure to wind and rain, it is common for mesh on the screen doors to develop rust. While there are no visible holes and tears, rush can severely weaken the link between the door frame and the screen. Moreover, rust can affect the overall durability, functionality, and performance of your screen door. If left unattended, it can damage the whole frame, and you will end up replacing the entire door. To fix this issue, you want to address the rust first by using a rush converter or repainting the rusted areas and replacing the mesh. 3. To Improve Airflow One of the reasons for having a mesh screen door is to improve the airflow and increase ventilation in the house. Over the years, due to debris, dust, and dirt, the mesh on the screen doors can become clogged, which restricts air circulation. In Ontario, where summer can get very humid and hot, a lack of ventilation in the house can make the environment uncomfortable. Read more about Is It Worth Replacing Windows And Doors In Ontario? Plus, the older mesh could have been more effective in allowing air to flow freely in and out of the house. On the contrary, the new mesh is made with finer material to increase airflow in the house. So, if your mesh is clogged, replace it with a new one to enhance comfort and ventilation. 4. To Enhance Durability Old mesh tends to have rust, holes, and tears on it, which kills the purpose of regulating temperature, improving ventilation, and keeping bugs and insects out. Due to harsh weather in Ontario, the mesh can lose its functionality and durability over time. To address this issue, modern mesh for screen doors is now made of high-quality materials like fiberglass or stainless steel. These materials provide excellent durability and can withstand corrosion, extreme weather conditions, and other external factors. Upgrading one of these materials will ensure you do not patch up the mesh every other day or replace it every couple of years. 5. To Increase Energy Efficiency In Ontario, where the weather can go from humid and hot to harsh and freezing, maintaining a consistent indoor temperature is important to keep your house comfortable all the time. However, it is not possible with damaged and old mesh on the screen. In fact, your heating and cooling system works harder to keep your house warm in winter and cool in summer if the mesh is worn out. As a result, you are struck with a hefty energy bill every month. While you have a properly insulated house, most of the time, it’s the windows and doors that allow heat to escape and outside air to flow in the house. To make your home energy efficient, make sure your doors are in their optimal condition, including the screen door. Subsequently, replace the old one with the new and tighter mesh to prevent air leaks, improve energy efficiency, and save on energy bills. 6. Cost-Effective Maintenance When you notice any wear, tear, rust, or holes in the mesh, the immediate solution is to replace the mesh. Replacing only the mesh on the screen door is much more cost-effective than replacing the entire screen door. If the frame is intact and in optimal condition, there is no point in replacing the door. Every few years, you must replace the mesh on the screen door to ensure better airflow, energy efficiency, and functionality. This maintenance will extend the lifespan of your screen door and make sure you can save money at a time. Step-by-Step Guide to Replacing the Mesh on a Screen Door If you are thinking of replacing the mesh on the screen door, we have you covered. While many people prefer to consult with professionals like Custodia to replace the mesh or the entire screen, doing it yourself is easier than you think. It just requires you to have a few necessary tools and equipment on hand. (Related read Can I Replace A Screen Door Myself In Ontario?) Plus, to carry out the job itself, you must follow these steps: 1. Assess the Damage Before you start with the project, you want to assess the damage. If the damage is only limited to the mesh, it can be easily fixed by…
Read more

A fencepost acts like a security net for the rest of your fence. This means keeping it in its best condition is essential to maintain the overall look and health of the post. So, if you notice any signs of damage in the post or a rotten fence post, like rush, discoloration, and soft wood, you must repair or replace it immediately. Ontario is known for its fluctuating weather and extreme conditions. This means humid summer and freezing winter can take a toll on your fence post, which often results in rotting and decay. Therefore, repairing the damaged section before further deterioration can save you a lot of money and worry. Below, we have mentioned how you can repair the rotten fence post. So, let’s dive in. 5 Main Causes of Fence Post Rotten Numerous causes can lead to the rotting and decay of fence posts. While moisture is always the primary culprit, knowing what the other causes are will help you prevent rotting. Here are a few common causes of fence post rot in Ontario. 1. Moisture Exposure One of the biggest threats to wood fence posts is exposure to damp conditions. When the wood post is in direct contact with the wet soil for a longer period, it creates an ideal condition for fungi and bacteria to grow. These bacteria and fungi can slowly east away your wooden post, leading it to decay and rotting. This type of rotting usually starts with the installation process, where damp soil is often overlooked. So, to prevent that from happening, make sure to reinforce fence posts with cement so that it stays protected for years. Read more about Is It Worth Staining An Old Fence? 2. Poor Drainage Inadequate drainage is another leading cause for fence posts to rot, particularly wooden posts. This is because when excessive water accumulates in the soil around the post due to poor drainage, it leads to rotten fence posts. The constant damp environment creates perfect growing conditions for fungi to grow. Over time, these bacteria eat the structure and weaken it, promoting rot. To treat this, make sure to replace the rotten post with new and rot-resistant ones made of metal or pressure-treated wood. Also, gravel should be installed around the post base to improve drainage in that area. 3. Insect Damage Pests and insects are often the primary culprits of rotten fence posts. Pests and insects like termites, carpenter ants, and wood boring beetles can create galleries and tunnels within the wood. These holes can allow moisture to penetrate deep into the wood fence and cause rot-causing fungi, which damage the fence post to the point of no return. In such cases, the only solution is to repair or replace the damaged fence altogether. 4. Excessive Rainfall Ontario receives a lot of rainfall and has broken records in the past few years. Houses in areas that experience excessive rainfall often have to deal with rotten fence posts. This is because regular and heavy rain can saturate the ground, causing prolonged exposure to moisture. If not treated properly on time, fence posts, significantly wooden posts, can absorb water and cause wood to decay from the ground level. To prevent this from happening, make sure to apply wood preservatives to extend the lifespan of the fence post. 5. Sprinkler Systems Most of the time, excessive moisture is the leading cause of a rotten fence post. The sprinkler system plays a massive role in keeping soil and wood wet all the time, especially when the target is mostly the base of the fence post. This, as a result, allows the wood fence post to decay or rot over time. To prevent this from happening, you simply need to adjust the head of the sprinkler and move it away from the base of the post. You can also install splash guards to ensure minimum moisture exposure at the post area. 5 Key Signs of a Fence Post Rotten While knowing the causes can help you treat the rotten fence post, identifying early signs can help you prevent further damage. Spotting the early signs of a fence post rot can help you treat the damage and make the necessary repairs to ensure the longevity of the post. Here are a few signs you must look out for: 1. Soft or Spongy Texture If the post feels soft or spongy when you press it, this means moisture has already penetrated deep into the wood, and fungi are growing. The ideal texture should be rugged and sturdy, just like standard wood. If you identify the issue, the first step should be replacing the rotten areas with new ones and securing the base of the post with concrete. However, if the damage is beyond repair, it is better to replace the entire post to maintain structural integrity. You can either do it yourself or call a professional post replacement company like Custodia to do that for you. 2. Leaning Posts If you are noticing a leaning fence post, this is a clear sign of decay and rotting at the base. If the base has become unstable, it’s either because the soil is wet or the wood has excessive moisture. Additionally, the fence is soft and spongy, and the damage is greater than you are anticipating. To fix this issue, you want to follow the same method of securing the base of the post with the cement. You can also replace the rotten and spongy part of the wood with the new parts to ensure stability. 3. Separation from Panels Separation of the post from panels is usually caused by the excessive moisture accumulated at the base of the post. Due to the rotting and weakened wood, the panels start to pull apart, and the post is unable to be supported. The detachment of the panels is typically the cause of moisture damage at the base, which can further advance to soft and spongy fence posts. So, when you notice the separation,…
Read more
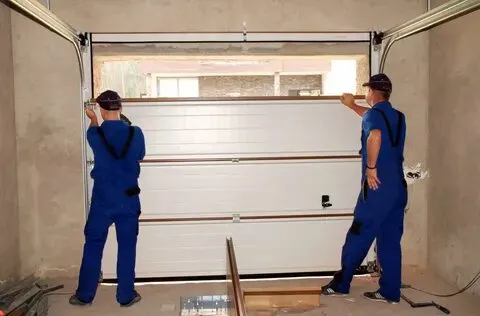
Are you considering installing a garage door yourself in Ontario? If yes, you have come to the right place. In this article below, we will walk you through all the steps you need to install a door yourself. We will also talk about things you must consider when buying a new door and installing it yourself. While the installation process is difficult and time-consuming, there is nothing better than taking on a project and completing it all by yourself. Let’s dive right into it. How to Install Garage Door By Yourself If you are thinking of installing a garage door yourself, it is important to know that doing so can be difficult if you do not have the proper knowledge and skills to do so. While most people call professionals, Like Custodia in Ontario, some prefer to do it themselves to save on the installation costs. Related read: What Is The Average Price Of Installing A New Door In Ontario? Here is a step-by-step guide on how to install a garage door yourself: 1. Take Precise Measurements The process of installing a new garage door starts with accurately measuring the garage opening. For this, you must take a measuring tape and take precise measurements of width and height from multiple places. It is important to collect the right size as it will ensure proper installation that will last you years. 2. Check the Existing Frame When collecting the size of the garage door, you do not want to forget the frame condition. Inspect the condition of the existing frame and make repairs where needed. This step is important as you want your door to sit and fit perfectly for stability and longevity. 3. Buy the Garage Door After making sure the frame is in good condition and you have the right measurements, visit your local hardware store to pick your desired garage doors. Garage doors come in a variety of types, materials, and sizes, so make the choice based on your preferences. 4. Install the Track Once you have your hands on the garage door. It is time to install it properly. Start by attaching the track system to the ceiling using proper equipment and hardware. Also, make sure it is level. Next, by using mounting brackets, you need to adjust the height of the tracks according to your preference. 5. Hang the Door By following the manufacturer’s instruction manual, assemble the door section and screw in the hinges. Next, you want to install the rollers on the door section and put them on the tracks so that they can slide smoothly. 6. Attach Cable and Spring System You also want to make sure that you are attaching the cable and spring system accurately to ensure proper door balance. To do this, start by connecting the cable to the door section and then attach the torsion system. You want to adjust the tension of the torsion spring until the door seems perfectly balanced. 7. Install Door Opener Next, you will need to install the door opener. Make sure the garage door opener you are selecting is compatible with the door type, weight, and size. For this, follow the manufacturer’s user manual to the word. 8. Final Checks Once everything is installed and attached, check your door for alignment so that it is opening, closing, and locking smoothly. You can add safety sensors as well, making sure your home is safe and secure all the time. What to Consider When Installing Garage Door Before you buy a new garage door for installation, you must be aware of a few important factors that make a whole difference. From selecting the size of the door to ensuring it has safety features, here are a few important considerations. 1. Garage Door Type and Size When it comes to choosing a garage door to install in Ontario, you must consider its type and size. These are two of the most important aspects to consider, as they can affect longevity and functionality. In Ontario, where the weather can get harsh with freezing cold and heavy snowfall in winter, you must install a door that is perfect for the local climate. Some of the most common types of garage doors include sectional, roll-up, side-hinged, carriage, and contemporary. Out of all these, sectional is probably one of the most common and popular choices. These are ideal for Ontario’s fluctuating weather as they offer excellent durability, insulation, and ease of use. Side-hinged garage doors are probably the most aesthetic option out of all, but they are not ideal for Ontario’s weather. Moreover, when choosing the size, there is no such thing as “almost” with the garage doors. For the door to offer proper durability, insulation, and functionality, you must choose the perfect size door. If the door was custom-built before, you will not find the size you are looking for in a hardware shop. You will need to have it custom-built again. 2. Material Selection Once you have finalized the type and size of the door, the next thing not to take lightly is the material of the door. Now, when choosing the material, you must consider factors like durability, insulation, and performance. For Ontario’s weather, your garage door must be functional and well-insulated. Selecting the right material will make a huge difference in maintaining energy efficiency and consistent indoor temperature. Among the choices include steel, aluminum, wood, vinyl, and fiberglass. Since the weather in Ontario can get very humid in summer and freezing cold in winter, a steel garage door is the best option. This is because steel doors work well in both cold and hot weather and offer excellent durability and insulation. Plus, they stay functional even during heavy snowfall and rain. With steel garage doors, your home will stay warm in winter and cold in summer, reducing your energy bill significantly. Fiberglass is another excellent option due to its durability and functionality, but it is less well-insulated than the steel door. When it comes to…
Read more
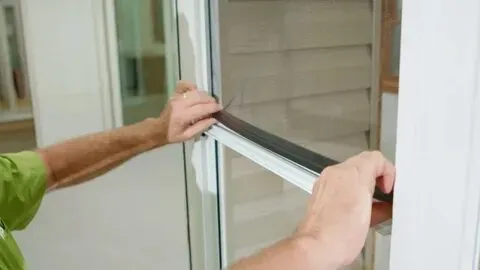
Installing a screen door comes with a lot of benefits. They increase ventilation, let a ton of natural light in, and improve the energy efficiency of the home as well. Plus, modern screen doors now come with enhanced security features that ensure you are protected all the time. However, if your screen door is not serving its purpose anymore, it is about time to replace it with a new and better one to enjoy all the benefits. If you are wondering whether or not you can replace it yourself, the answer is yes. But there are a few considerations you must know about. Let’s learn them in detail. Step-by-Step Guide to Replacing a Screen Door Unlike popular belief, most screen doors are durable and sturdy. If maintained well, they can last anywhere between 20 to 30 years in Ontario. However, other factors like environmental conditions, usage, and door materials play a huge role in determining the lifespan of a screen door. (Read more about Is It Worth Replacing Windows And Doors In Ontario?) In Ontario, where the weather can get a little challenging, your screen doors may not be as durable as they used to be. So, replacing it with a new one is the best way to maintain a comfortable and secure living space. And yes, you can do this at home with proper guidance and steps. Here is a step-by-step guide on how to replace your screen door at home. Step 1: Remove the Existing Screen Door If you have a hinged screen door, start by unscrewing those hinges to remove the existing screen door. Once you have removed the screws, gently pull out your current door away from the frame. However, if your door has a closer mechanism, you need to detach that as well to pull out the current door from the frame. On the contrary, for the sliding door, you can find the screws at the bottom of the door that are holding the wheels. These screws allow your door to slide open and close on its fixed track. So, you need to pull the door up and unscrew each screw to loosen up the wheels. You also want to locate and unscrew the head stop at the top corner of the frame so that you can remove it easily from the frame. Once each screw is unscrewed, gently remove the frame. Step 2: Measure the Door Frame Once you remove the old door, make sure to measure the frame and door to get the exact measurement. For this, use the measuring tape to get the height and width of both the door and frame. For accuracy, you want to measure at multiple points and get the measurements from the top, middle, and bottom of the frame. Moreover, you want to take measurements based on what type of door you want to install next. For instance, for sliding screen doors, you also need to measure the depth of the track. This will make sure that when you go out to purchase the new screen door, you know exactly what you need to make the right decision. Step 3: Shop for a Replacement Door Once you have all the measurements, the next step is to shop for a replacement door at a hardware store. Now, when it comes to buying a screen door, there are many factors come into play. Choosing the right material is extremely important, considering the fluctuating weather in Ontario. The best options include aluminum, fiberglass, vinyl, and sometimes even wood. The most common choice is aluminum, as it is durable, lightweight, rust-resistant, and easy to care for. Based on your budget and requirements, choose the screen door for your home. For standard door size, you can visit your local hardware store to buy the door you need. However, if you have a custom door installed with unique measurements, you need to have one tailor-made according to your requirements. Step 4: Install the New Door After buying the new door, it is time to install it in place. To do this, start by placing your new door in the opening. Make sure the door is sitting correctly in the frame. Next, mark the places where hinges will sit on the frame. Pre-drill the holes for the screws. Once you are satisfied with the placement, attach the door to the frame. Now, before screwing in the hinges and handle, you need to decide where you want the door to open from. For instance, if you wish your door to open from the left, you will attach the hinges on the right side, and vice versa. For the sliding scream doors, simply insert the top part of the door in the upper track and then tilt the door to add the lower part of the door in the lower track. Make sure the door is sitting perfectly on the sliding wheels. Step 5: Test Your New Door Finally, you have installed your new screen door. To check if it is working smoothly, open and close it several times. If the sliding door is not gliding smoothly, you simply need to adjust the rollers height with a screwdriver for proper functioning. Moreover, considering Ontario’s weather, adding a door sweep or weatherstripping is recommended to make your home more energy efficient, saving you on energy bills. Pros and Cons of Replacing a Screen Door Yourself Just like any DIY project, there are a few pros and cons to replacing a screen door yourself. Where on the one hand, you get to save money on hiring professionals to get the job done. On the other hand, mistakes may occur, which can end up costing you more than anticipated. Let’s weigh both the advantages and disadvantages of replacing a screen door so you can make an informed decision. Pros Cons Legal Considerations & Building Codes for Screen Doors Replacement in Ontario When it comes to installing a screen door in Ontario, there are specific legal considerations and building codes…
Read more