Now booking for Spring 2025 – Call 1-833-410-4357 or Book Online!
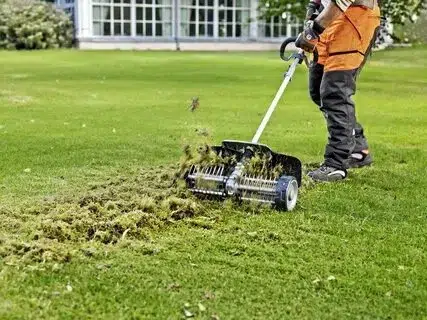
Did you know that Ontario’s unique climate can have a huge impact on your lawn? The cold winters and dry summers can make it tough for your grass to stay healthy. One thing you might not expect is that “Is aerating a lawn worth it in Ontario” and can actually be the key to keeping it green and lush, no matter the season. Aeration is a process that helps your lawn breathe by relieving soil compaction, which allows water, nutrients, and air to reach the roots more effectively. But why does this matter, and is it really worth it? For older adults (seniors), maintaining a lawn can feel like a chore. Aeration reduces the need for constant upkeep, making it easier to manage without heavy physical labor. For new homeowners, starting lawn care right from the beginning is crucial. A healthy lawn increases curb appeal and makes your home feel welcoming. If you own rental properties, the condition of your lawn can influence your property’s value and how appealing it is to potential tenants. Families and busy professionals might find it challenging to balance lawn care with their hectic schedules, which is why professional services can be a lifesaver. Ignoring your lawn’s early warning signs like thinning grass, water puddling, or dry patches can lead to costly repairs down the line. Without proper care, lawns can become prone to pest infestations or fungal growth, requiring more time and money to fix. That’s where Custodia’s home management plan comes in. Our plan ensures that your lawn is aerated at the right time and regularly inspected, preventing bigger problems down the road. Not only does this help keep your lawn in top shape, but it also boosts your property’s value and aesthetic appeal, complementing the overall landscape of your home. By choosing Custodia, you’re not just saving money in the long run—you’re ensuring that your lawn gets the care it deserves without the hassle. Our team of professionals will help keep pests at bay, maintain a vibrant yard, and handle all the heavy lifting so you don’t have to. You can also Book Online now for a hassle-free and well-maintained lawn that boosts your property’s value. Explore our professional lawn care, maintenance, and yard cleanup services in Ontario, Canada. Discover top-notch lawn care and yard cleanup services near you in Ontario! Whether you’re in Etobicoke, Mississauga, Hamilton, Oakville, or beyond, our experts are ready to help. Check out our service area page to see how we can transform your outdoor space today! What is Lawn Aeration and Why Is It Important? Lawn aeration is the process of perforating the soil to allow essential elements like air, water, and nutrients to reach grassroots. This practice is especially important for maintaining a healthy lawn in Ontario’s varying climate. Aeration helps alleviate soil compaction, which can suffocate grass and prevent it from receiving the moisture and nutrients it needs. Without it, lawns can become dry, patchy, and more vulnerable to weeds and diseases. What Are the 5 Benefits of Aerating a Lawn in Ontario? As we mentioned earlier, lawn aeration is crucial for maintaining a healthy and lush lawn, especially in Ontario’s challenging climate. The unique conditions of compact soil and seasonal fluctuations make aeration an essential part of lawn care. By opening up the soil, aeration allows vital nutrients to penetrate the roots, improving the overall health of your lawn. PS: Read Our Latest Blog to Discover the Benefits of Hydroseeding for Your Lawn Here are the top five benefits of aerating your lawn in Ontario. 1. Improve Soil Structure and Reduce Compaction Over time, soil compaction occurs due to heavy foot traffic or natural conditions, suffocating grass roots. Aeration helps loosen the soil, allowing air and water to flow more freely to the root zone. 2. Enhance Water Absorption and Nutrient Intake A well-aerated lawn improves water absorption and nutrient delivery, crucial during dry spells common in Ontario’s summers. This ensures that your lawn gets the necessary moisture and nutrients to thrive. 3. Boost Lawn Health and Thickness Aeration encourages root expansion, resulting in a thicker, greener lawn. Deeper roots mean better resistance to drought and an overall healthier lawn that can withstand seasonal stress. 4. Prevent Thatch Buildup and Disease Thatch, a layer of dead grass and debris, can suffocate a lawn. Aeration helps break down thatch and prevents the onset of lawn diseases, such as mold and fungus, by allowing grass to breathe. 5. Increase Property Value and Curb Appeal A well-maintained lawn adds value to your home by enhancing curb appeal. Aeration is a cost-effective way to ensure your lawn remains green and attractive, complementing your landscape and boosting property value. Different Types of Lawn Aeration: Core Aeration vs. Spike Aeration There are two primary methods for aerating your lawn, each with its own benefits. Understanding these methods can help homeowners, property managers, and tenants choose the right one based on their lawn’s condition and soil type. This method involves removing small plugs or “cores” of soil from the ground. Core aeration is more effective at reducing soil compaction, creating larger pathways for air, water, and nutrients to flow deep into the soil. In contrast, spike aeration uses a spiked roller to puncture holes in the soil without removing plugs. While this method is less invasive and easier to perform, it doesn’t reduce compaction as effectively as core aeration. Benefits of Core Aeration vs. Spike Aeration for Ontario Lawns Before choosing the best method for your lawn, it’s important to understand the specific benefits of each technique. Here’s a quick comparison of how core aeration and spike aeration can impact the health of your lawn. Benefits of Each Aeration Method? Core Aeration Benefits Spike Aeration Benefits Comparison Table: Core Aeration vs. Spike Aeration When Is the Best Time to Aerate a Lawn in Ontario? Aeration is essential for a healthy lawn, especially in Ontario’s diverse climate. The best time to aerate is typically in the fall. During this period,…
Read more
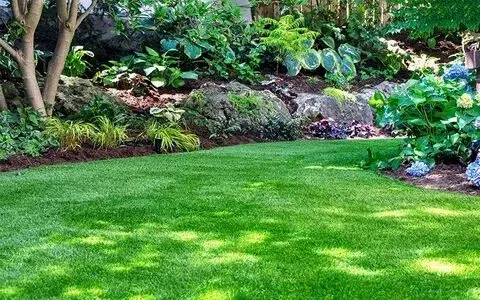
A lawn is a happy place in every home where people host gatherings, play with kids, play with pets, and spend summers enjoying the sun. However, today, making a lush and stunning lawn without spending a lot of money seems impossible. But not with us! In the post below, we mentioned the cheapest way to make a lawn in Ontario. To learn about these cost-saving and low-care tips, keep on reading. 5 Ways to Make a Lawn in Ontario on a Budget Wondering how to make a lawn in Ontario without breaking the bank? Here is how to do that without spending thousands of dollars: 1. Opt for Native Grass and Plants Varieties One of the best ways to make a lawn on a budget is by choosing native grass and plant varieties. This is because native plants and grasses are more compatible with your local climate and soil conditions. This means they will naturally thrive in your lawn, and you don’t have to spend extra resources to improve the growing conditions of your plants and grass. So, take your time, do your research, and pick the native plant varieties that match your requirements. Fortunately, Ontario is home to a variety of grasses, plants, flowers, shrubs, and trees from which you can choose. When it comes to grass types, you can pick from popular choices like perennial ryegrass or Kentucky bluegrass, big bluestem, little bluestem, and sideoats grama. Many homeowners also go for less popular options like switchgrass, bottlebrush grass, and northern sweetgrass. Since all these grasses are native to Ontario, they are not only drought-resistant, they support biodiversity, reduce weeds, and are low maintenance. When it comes to plants and flowers, you will find Wild Bergamot, Purple Coneflower, Black-eyed Susan, and Milkweed on almost every lawn in Ontario. This is because, once established, these plants require little maintenance, use less fertilizer and pesticides, and control erosion. Moreover, these native plants also help increase biodiversity, attract pollinators, and restore natural habitats for wildlife in your yard. Read more When To Stop Cutting Grass In Ontario 2. Seed Your Lawn Instead of Sod Seeding is another economical way to establish a beautiful and lush healthy lawn in Ontario. Lawn seeding is relatively inexpensive when compared to sodding, which usually costs a lot more than seeding per square foot. Sure, provides instant gratification, but it can cost hundreds of dollars per installation, especially when you have a vast lawn. So, if you are on a budget and looking for cheap ways to make a beautiful lawn, seed your lawn yourself. Beyond the cost, another popular reason why people choose to seed their lawns themselves is the range of grass types and varieties they can choose from. Typically, people go for Perennial Ryegrass or Kentucky Bluegrass. Both grass types are resilient and offer quick germination, making them the top choice for lawns in Ontario. Again, you want to choose the native grass type that naturally adapts to the local climate, soil types, and light conditions of your region. Plus, they require less maintenance than other options. Moreover, sodding can be laid at any time of the growing season, whereas seeding grows grass with a deeper root system. While seeding is inexpensive, it requires more effort and time for germination and to grow dense, lush grass, which can be a lot of work for seniors. Therefore, hiring a grass seeding service like Custodia for seniors is recommended, and it’s still more affordable than sodding. 3. Use Organic and Homemade Fertilizers Creating a beautiful and dense lawn in Ontario does not have to empty your wallet. There are many ways to make that happen within the budget. One way of doing that is by choosing organic and homemade fertilizers instead of chemical fertilizers. This is not only cheaper than chemical fertilizers, but it is also healthier for pets, seniors, and entire families. Organic fertilizers are made of all-natural materials with no chemicals or toxins. This means they are eco-friendly and do not have a negative impact on the environment. Today, especially when people are becoming more and more conscious of the products they consume daily, homemade fertilizers are gaining popularity in Canada. Since they are free from toxins, they also help get rid of toxic residues from the soil. Moreover, chemical fertilizers can take a toll on soil quality, making it hard to absorb all the essential nutrients it needs to grow strong grass roots. Organic lawn fertilizing, on the other hand, allows nutrients to penetrate deep into the soil, improving its overall quality and structure. You can easily make homemade compost at home using kitchen scraps and lawn waste. When it comes to the application, even seniors can spray them all over the lawn. If they can’t, Custodia offers exceptional lawn fertilizing service, helping seniors make a budget-friendly lawn in Ontario. Using organic and homemade compost, you can make eco-friendly and beautiful lawns on a budget. 4. Opt for Budget-Friendly Watering and Irrigation Maintaining a beautiful yard requires proper care and regular watering. However, traditional sprinklers might not be the most cost-effective solution. Sprinklers are the most popular option for watering your lawn, but they can stretch your water bills. While there are modern sprinklers that come with moisture sensors, water gauges, and timers to avoid over-watering and water waste, they can still lead to higher water bills. The first step towards reducing water waste is managing your watering schedule. Watering your lawn early in the morning (3–5 AM) minimizes evaporation. This means the lawn will retain moisture for a longer time, reducing the need to water it again and again. Next, you want to adopt a more traditional way to conserve water. In Canada, rain occurs at any time of the year. However, the country experiences most rain during spring and fall, whereas summer sees expected rainfall. In other words, about 7 days a month, it rains in Canada, offering homeowners an excellent opportunity to conserve rainwater for irrigation. So, all you…
Read more
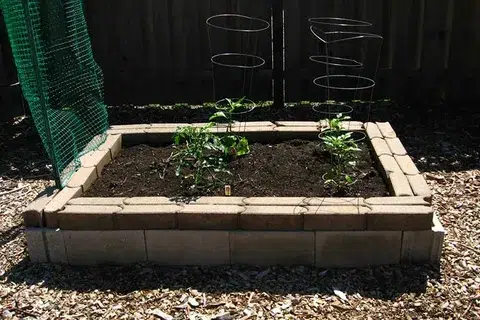
Gardening is more than just a hobby; it’s a deeply rewarding experience that can significantly enhance life in Oakville. For seniors, it’s a delightful way to engage with nature, boost mental well-being, and enjoy the outdoors. However, to truly make the most of your garden, understanding how to set it up correctly is crucial. One vital aspect of gardening that can be particularly beneficial for seniors is building a raised garden bed. Raised garden beds provide easier access, reduce strain on the back, and allow for better soil control. While the concept might seem straightforward, constructing a raised garden bed, especially with concrete blocks, can be challenging without proper guidance. In Oakville, concrete blocks have become a popular choice for building raised garden beds. They are durable, low-maintenance, and can add a stylish touch to your garden. Concrete blocks offer stability and strength, making them ideal for creating a long-lasting garden structure. Plus, they can withstand Oakville’s diverse weather conditions, ensuring that your garden bed remains sturdy throughout the year. Choosing the right materials and building techniques is essential to creating a successful raised garden bed. For many, this means seeking professional help. Hiring a local expert, such as Custodia, for your gardening, lawn care and yard maintenance in Oakville needs can ensure that your raised garden bed is built correctly and efficiently. Custodia’s team understands the unique needs of Oakville’s climate and soil, and they bring expertise to every project. So, let’s dive in and explore how to build a raised garden bed with concrete blocks. We’ll cover everything you need to know to create a beautiful and functional garden space. Planning Your Raised Garden Bed In Oakville When planning your raised garden bed in Oakville, thoughtful consideration of location, size, and shape is crucial to maximizing both plant health and your gardening experience. Oakville’s climate, characterized by cold winters and warm, humid summers, requires careful planning to ensure your plants thrive year-round. The right planning can lead to a garden that not only flourishes but also remains accessible and easy to maintain, especially for seniors who benefit from reduced physical strain. 1. Choosing the Location Select a spot that receives at least 6-8 hours of direct sunlight daily. This amount of sunlight is essential for photosynthesis, which drives plant growth and yields. In Oakville’s latitude, positioning the bed in a south-facing area helps maximize light exposure throughout the growing season. Opt for an area with naturally well-draining soil to prevent waterlogging, which can lead to root rot and disease. Elevating the bed on slightly sloped ground can enhance drainage. Additionally, consider the ease of access for planting, watering, and harvesting, ensuring paths are wide enough for mobility aids if needed. Position your garden bed near a water source, like an outdoor faucet or rain barrel, to facilitate regular watering. Consistent moisture is key, especially during the hotter months when Oakville can experience periods of drought. 2. Determining the Size and Shape Standard dimensions, such as 4×4 or 4×8 feet, are often recommended because they balance ample planting space with ease of reach. However, customizing the size to fit your specific garden layout can optimize space utilization and allow for tailored plant arrangements. Rectangular beds are the most versatile, allowing for efficient row planting and easier access. Square beds are compact and great for intensive planting, making them ideal for smaller spaces. Circular beds offer a unique aesthetic and can be strategically placed to create focal points in your garden, though they may require more careful planning for plant layout. A height of 12-24 inches is generally recommended. This range provides sufficient soil depth for most vegetables and flowers, while also reducing the need for bending or kneeling, which is especially beneficial for seniors. For those with mobility challenges, consider raising the bed to waist height, around 30-36 inches, for even greater accessibility. Steps for Building A Raised Garden Bed With Concrete Blocks In Oakville Building a raised garden bed with concrete blocks in Oakville is a practical and durable solution that enhances your gardening experience while withstanding the local climate. Here’s a brief overview of the process, along with reasons why hiring a professional may be a wise choice. 1. Planning and Preparation The first step involves selecting the right location for your garden bed. This includes choosing a spot with ample sunlight, good drainage, and easy access to water. Next, you’ll need to determine the size and shape of your bed, considering factors like the types of plants you want to grow and ease of access. 2. Laying the Foundation Once the location is set, the ground needs to be leveled, and a weed barrier should be installed to prevent future weed growth. A gravel base is then added to ensure proper drainage, which is especially important in Oakville’s climate to avoid waterlogging. 3. Building the Structure Concrete blocks are then carefully placed to form the walls of the bed. They should be aligned and stacked securely to ensure stability. Depending on the desired height, you may need multiple layers of blocks. 4. Filling and Planting After the structure is built, the bed is filled with a mix of quality soil and compost to provide a rich growing medium for your plants. Once filled, you can begin planting your chosen vegetables, herbs, or flowers. Why Hire a Professional Instead of DIY? While building a raised garden bed with concrete blocks may seem straightforward, there are several reasons to consider hiring a professional company like Custodia. A pro can ensure that the foundation is properly leveled and that the blocks are securely placed, preventing future issues like shifting or collapsing. They also bring expertise in selecting the right materials and soil composition for Oakville’s climate, which can make a significant difference in your garden’s success. Additionally, professionals can save you time and effort, especially if you’re not experienced in construction or gardening, and can provide a long-lasting, aesthetically pleasing garden bed that enhances your outdoor space. Choosing Plants Suitable for…
Read more
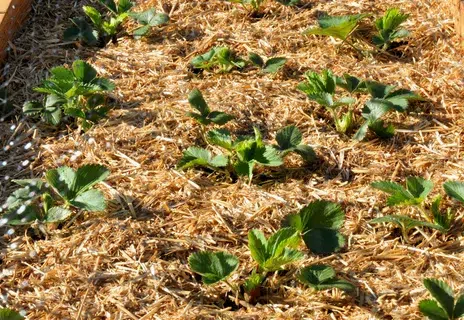
Maintaining a vibrant lawn in Hamilton requires more than just occasional mowing. One essential aspect of lawn care that often gets overlooked is mulching. Knowing the best time to spread mulch is crucial, as it can significantly impact the effectiveness of this practice. Many homeowners, especially seniors in Hamilton, may not fully appreciate the benefits of mulching. However, it’s a valuable investment that plays a crucial role in lawn health and aesthetics. So, why is mulching so important? First, mulch helps retain soil moisture, reducing the need for frequent watering. It also provides insulation, keeping the soil temperature stable. This is particularly beneficial in Hamilton’s fluctuating climate, where extreme temperatures can impact plant health. Additionally, mulch suppresses weeds, which compete with your grass for nutrients and water. By applying mulch, you create a barrier that prevents weeds from taking over, thus ensuring your lawn remains lush and healthy. Hamilton’s seasons significantly influence when to spread mulch. Leaving your lawn unattended can lead to several issues. Without proper mulching, your lawn may suffer from moisture loss, weed infestation, and temperature extremes. These problems can ultimately diminish the beauty and health of your yard. Before we dive deeper, let’s clarify what mulch is and how it benefits lawn maintenance, particularly for seniors and homeowners in Hamilton. What is Mulch? Mulch is a protective layer spread over the soil’s surface, often made from organic or inorganic materials. For seniors and homeowners in Hamilton, mulch simplifies lawn care by reducing the need for frequent watering and limiting weed growth, making garden upkeep easier and more manageable. Types of Mulch Mulch comes in two main varieties: Includes natural materials like wood chips, leaves, and compost. As it decomposes, it enriches the soil with nutrients, improves its texture, and retains moisture. Made from non-biodegradable materials like gravel or rubber. It provides long-term coverage, effectively controls weeds, and helps with moisture retention but doesn’t add nutrients to the soil. Functions of Mulch in Hamilton’s Lawns and Gardens Mulch plays several key roles: Proper mulching enhances the health and beauty of your lawn, making it an invaluable practice for any homeowner in Hamilton. When Is The Best Time To Spread Mulch In Hamilton? Hamilton’s unique climate, characterized by distinct seasons, requires strategic mulching to protect and nourish your lawn. Mulching at the right time can maximize its benefits, ensuring your garden thrives throughout the year. 1. Spring Mulching 2. Summer Mulching 3. Autumn Mulching 4. Winter Mulching Avoid overly thick layers, which can trap moisture and potentially cause root rot. By aligning your mulching practices with Hamilton’s seasonal climate patterns, you can ensure your lawn remains healthy and resilient year-round. Read our latest blogs on How Long To Let New Grass Grow Before Cutting and When To Start Spring Lawn Care 5 Signs of Improperly Applied Mulch in Hamilton Improper mulching can cause more harm than good. Here are five signs that mulch has been applied incorrectly: How Does Mulching Impact Water Usage in Hamilton Gardens? Mulching has a significant impact on water usage in Hamilton’s gardens: How Mulch Helps Seniors Save on Water Bills & Maintenance Costs Mulching is particularly beneficial for seniors looking to reduce garden maintenance costs: Do you Need Help Saving Money on Lawn Maintenance in Hamilton? Maintaining a beautiful lawn can be costly and time-consuming, especially for seniors. But with the right care, you can save both money and effort. At Custodia, we specialize in helping seniors in Hamilton keep their lawns in top shape without breaking the bank. From expert mulching that reduces water bills to comprehensive lawn care that cuts down on maintenance costs, we’re here to make your life easier. Ready to Start Saving? Call us today at 1-833-410-4357 or schedule a free consultation online to learn how we can help you maintain a beautiful, low-maintenance lawn all year round.
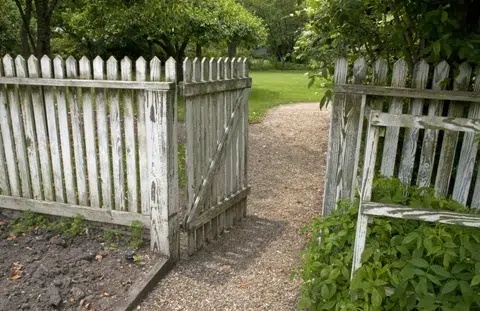
When it comes to maintaining a home in Hamilton, Ontario, the fence is an essential feature that often gets overlooked. A good fence does more than just mark the boundary of your property. It plays a key role in ensuring your safety, enhancing the aesthetics of your yard, and even adding value to your home. However, like every other part of your house, fences can lose their shine over time. And with Hamilton’s unpredictable weather, this process can happen even faster. The harsh winters, heavy rains, and strong winds all take their toll, leaving your fence looking worn and tired. When you think about sprucing up your yard, it’s easy to focus on things like a lush, green lawn or stunning landscaping. But there’s another investment that can make a huge difference—staining your old fence. You might be surprised at how beautifully a fresh stain can transform your home. Staining not only revives the color and look of your fence but also protects it from the elements, making it last longer. This brings us to a common dilemma that many homeowners face: should you replace your aging fence or try to revitalize it? The good news is that staining is a cost-effective way to breathe new life into your fence without the hefty expense of replacement. It’s an easy, affordable way to extend the life of your fence and enhance the overall appearance of your property. But tackling this project can be tricky, especially if your fence is old or damaged. This is where Custodia comes in. Our fence staining and repair experts in Hamilton can help you restore your fence to its former glory. Whether it’s staining, repairing, or both, we’ve got you covered. Call us today at 1-833-410-4357 or book online to get started. And while you’re at it, don’t forget to check out our custom home management services. From handyman work to yard maintenance, our Home Management Plan offers a full range of services to keep your home looking its best. Is it Worth Staining an Old Fence? Staining an old fence is a decision many homeowners face, especially when considering how to maintain or enhance their property’s appearance. An old fence can detract from the overall look of your home and may also be at risk of further damage if left untreated. But is it worth the effort and cost to stain an old fence? The answer often depends on the condition of the fence and what you hope to achieve. Benefits of Staining an Old Fence? Below are six (6) key reasons why staining an old fence can be a worthwhile investment: 1. Enhanced Appearance Over time, fences can fade, become discolored, or develop a weathered look. Staining revitalizes the fence’s appearance, giving it a fresh, vibrant color that can significantly improve your home’s curb appeal. A well-stained fence can make your yard look more polished and well-maintained, enhancing the overall aesthetic of your property. 2. Increased Durability Staining adds a protective layer to the wood, helping to shield it from the elements. This is especially important in areas like Hamilton, where fences are exposed to harsh weather conditions. A good quality stain can help prevent moisture from seeping into the wood, reducing the risk of warping, cracking, or rotting. This protective barrier can extend the life of your fence, making it more durable over time. 3. Cost-Effective Maintenance Replacing a fence can be a significant expense. Staining, on the other hand, is a relatively low-cost way to maintain the fence and delay the need for replacement. By regularly staining your fence, you can protect the wood and keep it in good condition for years, saving you money in the long run. 4. Protection Against UV Damage The sun’s UV rays can cause wood to fade and weaken over time. Staining provides UV protection, helping to preserve the wood’s natural color and strength. This is particularly beneficial for older fences that have already started to show signs of aging due to sun exposure. 5. Improved Resistance to Mold and Mildew In damp or humid climates, fences are at risk of developing mold and mildew, which can cause unsightly stains and weaken the wood. A high-quality stain can help repel moisture, reducing the likelihood of mold and mildew growth. This not only keeps the fence looking better but also helps maintain its structural integrity. 6. Environmental Benefits Staining an existing fence rather than replacing it is an environmentally friendly option. By extending the life of your fence, you reduce the demand for new wood, helping to conserve natural resources. Additionally, many stains are available in eco-friendly formulas that minimize harmful chemicals, making this a more sustainable choice. How Hamilton’s Climate Affects Fence Hamilton’s climate plays a significant role in determining the longevity and condition of fences. Understanding how local weather conditions impact your fence can help you take appropriate steps to maintain it and extend its lifespan. Here’s how Hamilton’s climate affects fence longevity: Extreme cold and heat cause wood to expand and contract, leading to warping and cracking. Cold can make wood brittle, while heat dries it out. Elevated humidity can cause wood to absorb moisture, leading to swelling, warping, and an increased risk of rot. It also promotes mold and mildew growth. Frequent rain accelerates wood deterioration. Persistent moisture can cause rot and weaken the fence, especially if the wood isn’t properly sealed. Snow and ice add weight to fences and can lead to leaning or collapse. Melting snow introduces water that can further cause wood rot. Sunlight and UV rays dry out wood, causing it to lose color and become brittle. UV damage can significantly shorten the fence’s lifespan if not protected. Strong winds can stress the fence structure, leading to loosening or breaking of panels and posts. Over time, this can weaken the overall stability of the fence. How Much Does It Cost To Stain An Old Fence? When considering staining a fence, it’s important for seniors to understand the costs…
Read more
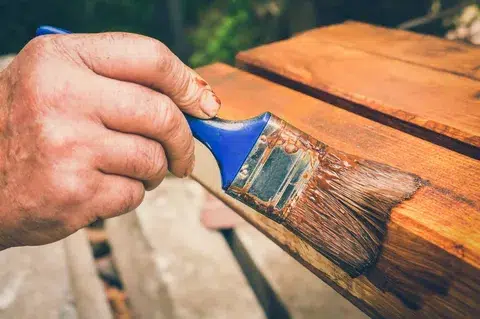
Have you ever gazed at your deck and fence and wondered why they look so drab and uninviting? A poorly maintained deck and fence not only diminish your home’s curb appeal but also impact its overall value. Neglecting these vital components can lead to more than just aesthetic problems. It can result in serious safety hazards, especially for seniors and children who may be more vulnerable to accidents caused by unstable or damaged structures. In Hamilton, where the climate fluctuates dramatically, the effects on outdoor wood structures can be severe. Our region experiences a mix of high humidity, heavy rainfall, and harsh winter conditions. These elements can accelerate the deterioration of your deck and fence, causing wood to swell, split, and eventually rot. When wood is exposed to such conditions without protection, the damage can become extensive, leading to costly repairs or even replacements. The good news is that maintaining your deck and fence doesn’t have to break the bank. Regular staining is an effective and affordable way to safeguard these outdoor features. Why Stain Your Deck and Fence? Staining not only enhances the natural beauty of the wood but also provides a protective barrier against the elements. This simple treatment helps prevent moisture from seeping in and causing rot, while also shielding the wood from harmful UV rays that can cause fading and splintering. Fortunately, with Custodia’s expert deck and fence repair services in Hamilton, you can easily restore the charm of your outdoor spaces. Our team specializes in deck and fence staining and repair, understanding the unique challenges posed by our local climate. Let’s dive in and discover how to properly stain and protect your deck and fence in Hamilton! What is Deck and Fence Staining? Deck and fence staining is a vital process that involves applying a specialized product to wooden surfaces to enhance their appearance and protect their longevity. Unlike paint, which creates a solid, opaque layer, stain penetrates deeply into the wood. This allows the natural beauty of the wood grain to shine through while providing essential protection from the elements. Key Aspects: There are primarily two types of stains: oil-based and water-based. Proper application involves cleaning the wood thoroughly to remove dirt and old finishes, applying the stain with a suitable tool (brush, roller, or sprayer), and allowing it to dry completely. This process ensures the stain adheres properly and provides maximum protection and aesthetic appeal. Why is Staining Important for Wood Protection? Staining is crucial for maintaining the integrity of wood structures like decks and fences. Without proper treatment, wood is vulnerable to damage from environmental factors such as sun exposure, moisture, and temperature fluctuations. What Are The Benefits of Staining Deck and Fence? Wood is susceptible to UV radiation, which can cause it to fade and degrade. Stain contains UV blockers that shield the wood from these harmful rays, preserving its color and structural integrity. Stain helps create a barrier that prevents water from seeping into the wood. This reduces the risk of swelling, warping, and rot, which can significantly damage the wood over time. Many stains include antimicrobial agents that prevent the growth of mold and mildew. These fungi thrive in damp conditions and can cause unsightly stains and decay, so this added protection is crucial. As wood ages, it can become brittle and prone to cracking. Stain helps maintain the wood’s flexibility, reducing the risk of splits and cracks that can compromise its appearance and safety. A well-stained surface requires less frequent maintenance. The protective layer reduces wear and tear, making it easier to keep your deck or fence in good condition with minimal effort. PS: Speaking of “maintenance”, here are reasons why yard cleanups are important and how your fence and deck can benefit from our yard cleanups. How Does Staining Enhance the Appearance of Deck and Fence in Hamilton? Staining your deck and fence can dramatically transform their appearance, enhancing both the look and feel of your outdoor spaces. In Hamilton’s unique climate, where weather conditions can vary significantly, proper staining not only improves aesthetics but also provides essential protection. Aesthetic Benefits: Stains are available in a variety of colors and shades, allowing you to choose a finish that complements your home’s exterior and landscape. This flexibility means you can achieve a look that aligns with your style, from deep, rich tones to light, natural hues. Unlike paint, which can obscure the wood grain, stains enhance the natural texture and patterns of the wood. This provides a more authentic and warm appearance, highlighting the unique characteristics of each piece of wood. Staining can even out the wood’s color, eliminating inconsistencies and patchiness. This results in a smooth, cohesive appearance that enhances the overall look of your deck and fence. Stains accentuate the natural grain of the wood, making the texture more pronounced and visually appealing. This added depth can make your deck and fence stand out and look more sophisticated. A beautifully stained deck or fence can significantly boost your home’s curb appeal, making it more inviting and attractive to visitors. This improvement can positively impact your property’s value. With a wide range of stain types and colors available, you can personalize the appearance of your deck and fence to suit your specific preferences and the overall aesthetic of your property. What Are the Long-Term Benefits of Staining? Regular staining provides numerous long-term benefits, contributing to the durability, safety, and aesthetic appeal of your wooden structures. Top 5 Long-Term Benefits: By protecting wood from environmental damage, staining significantly extends the life of your deck and fence. This means fewer replacements and repairs, saving you money in the long run. Stained wood is less prone to damage, which means you spend less on maintenance and repairs. This cost-effectiveness is a major advantage of investing in regular staining. Properly stained wood is less likely to splinter or crack, reducing the risk of injuries to children, pets, and visitors. This enhances the safety of your outdoor spaces. Well-maintained and aesthetically pleasing…
Read more
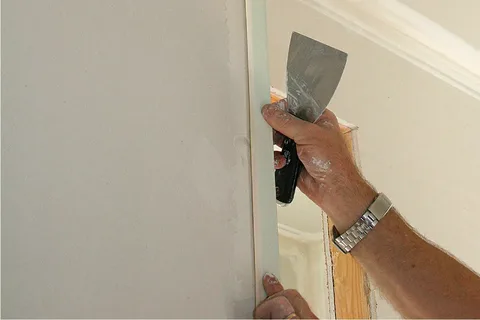
Have you ever observed cracks, peeling paint, or uneven surfaces at your drywall corners? These issues are not just cosmetic flaws—they indicate a poorly executed drywall job. So, why is it essential to get drywall outside corners right, particularly in Hamilton? Let’s delve into the details. Drywalling outside corners properly is crucial for both the appearance and structural integrity of your home. An outside corner is where two walls meet at an angle, and a well-finished corner enhances the overall look of your walls, while a poorly done corner can detract from it. In Hamilton, local climate and building practices present unique challenges. For instance, the region’s variable temperatures and humidity can impact how quickly the joint compound dries and how well it adheres, making the process more demanding. Choosing the right materials for drywalling outside corners is just as important as the technique used. Metal and plastic corner beads, for example, each have their advantages. Seniors and homeowners frequently ask; Can I drywall outside corners myself, or should I hire a professional? While tackling DIY projects can be rewarding, drywalling outside corners is a task that requires precision and care. For seniors, the physical demands of the job—like climbing ladders and handling heavy materials—can be particularly taxing and risky. Incorrect handling or installation can lead to long-term issues, such as structural weaknesses or health problems related to overexertion. The importance of properly drywalling outside corners extends beyond aesthetics. A well-done job prevents future complications, such as cracks and moisture damage, which can be costly to repair. (Read this complete guide on How To Patch And Repair Drywall In Hamilton) This article is designed to guide you through the process, providing you with detailed insights and practical tips to ensure your drywall corners are flawless. If you’re facing challenges or prefer professional assistance with your home improvements and renovation projects in Hamilton, Custodia is here to help. Our team of experts is ready to handle your drywall needs with precision. Call us today at 1-833-410-4357 or book online! Check our custom home management services and explore our Home Management Plan and pricing for the best solutions for your home. Let’s dive into the details and make sure your drywall corners are done right, enhancing both the beauty and safety of your home. Understanding Outside Corners – Definition and Importance Outside corners in drywalling are the points where two walls intersect at an angle, typically creating a 90-degree junction. These corners are not only pivotal for the visual appeal of your walls but also for their structural integrity. Properly finished outside corners contribute to a seamless, polished look while ensuring durability against everyday wear and tear. An incorrectly finished corner can lead to visible defects like cracking and peeling, which not only detract from the room’s aesthetics but can also compromise the wall’s stability over time. Ensuring these corners are expertly done is essential. They act as a buffer against impacts and abrasions, thereby extending the life of your drywall and maintaining the overall quality of your home’s interior. What Materials Do I Need To Drywall Outside Corners? For a high-quality drywall finish at outside corners, several key materials are used: Provides a sharp, durable edge and comes in metal, plastic, or paper-faced varieties. Metal corner beads are highly durable and suitable for high-traffic areas, while plastic beads resist rust. Paper-faced beads offer a balance between flexibility and strength. Applied to cover and smooth the corner bead, this material fills gaps and helps blend the corner bead seamlessly with the surrounding drywall. It’s available in different types, including all-purpose and lightweight, to suit various needs. Reinforces the joint compound and prevents cracks. Options include paper tape, which is easier to use with joint compound, and mesh tape, which is self-adhesive and suitable for quick applications. Applied before painting to seal the joint compound and create an even surface for paint. Using a high-quality primer ensures better adhesion and a smoother finish. Used for smoothing the dried joint compound. Different grits are used for different stages, from coarse for initial sanding to fine for final smoothing. Selecting the appropriate materials is crucial for achieving a professional finish that will stand the test of time. Local Considerations In Hamilton, several local factors must be considered for drywalling outside corners: Hamilton experiences varying humidity levels, which can affect the drying time of joint compounds. High humidity may prolong drying times, increasing the risk of imperfections. The region’s temperature changes can impact the drying and setting of joint compounds. Rapid temperature shifts can cause the compound to expand or contract, leading to potential cracking. In Ontario, building codes stipulate specific requirements for drywall installation to ensure safety and durability. For example: To ensure your drywalling project meets all local regulations and withstands the unique conditions in Hamilton, contact Custodia. Our experts are knowledgeable about local codes and will ensure your installation is compliant and high-quality. Learn more about our handyman services in Hamilton and how we can help with plumbing and moisture problems. Call us today at 1-833-410-4357 or book online! What Types of Corner Beads Are Best for Drywalling? When drywalling, choosing the right corner bead is crucial for achieving a smooth, durable finish. Corner beads protect the edges of drywall where two walls meet, providing strength and a clean appearance. Different types of corner beads offer varying benefits, so understanding their features can help homeowners and seniors make an informed decision. Each type of corner bead has unique characteristics that can affect its performance and suitability for different applications. Consider the following options: These are made from galvanized steel or aluminum and are highly durable. They offer excellent protection against impacts and are ideal for high-traffic areas. Metal beads provide a sharp, clean edge and are less likely to deform compared to plastic alternatives. However, they require proper installation to avoid rusting, especially in high-moisture areas. Made from PVC or other plastics, these beads are resistant to rust and corrosion. They are flexible…
Read more

Have you ever noticed how a beautifully maintained wall can truly enhance the look of your home drywall? It’s amazing how well-kept walls not only boost your home’s charm but also add to its value. But what happens when a dent, crack, or hole disrupts that flawless appearance? These patch and repair drywall problems can quickly turn into unsightly eyesores. Accidents are part of life, and while no one sets out to damage their walls, it happens. Kids playing indoors, moving furniture, or even just everyday wear and tear can lead to drywall damage. In Hamilton, Ontario, the local weather plays its part too. Humidity and temperature fluctuations can cause drywall to expand and contract, resulting in cracks and other issues. As a homeowner or senior in Hamilton, dealing with drywall damage promptly is key. While DIY fixes might seem like a good idea, consulting a professional is often the better choice. A skilled home maintenance company like Custodia can tackle these repairs early, preventing them from turning into bigger problems and more expensive fixes. Beyond just aesthetics, damaged drywall can lead to moisture issues that may result in mold and mildew—both of which can affect your health. Don’t let drywall damage compromise your home’s beauty or your well-being. At Custodia, our experts are ready to help you address these issues effectively. Let’s dive in and explore how to patch and repair drywall to keep your home looking its best. Common Drywall Issues in Homes Drywall is a fundamental element in most homes, contributing both to structure and aesthetics. However, it is susceptible to various issues that can affect its appearance and functionality. Understanding these common problems is key to maintaining your home effectively. Types of drywall damage Drywall damage comes in various forms, each drywall requiring specific repair techniques. Here are the top 10 types of drywall damage, along with their common causes: Often caused by nails, screws, or minor impacts. These are usually easy to fix with spackle or joint compound. Prompt repair helps maintain the wall’s appearance and prevents further damage. Result from more significant impacts, such as door handles or accidents. These typically require a patching process, including a mesh or paper patch and joint compound. Repairing these holes early prevents them from becoming larger issues. Created by substantial impacts or removal of fixtures. These require a more extensive repair process, including cutting out the damaged section and installing a new piece of drywall. Proper repair ensures the wall’s structural integrity is maintained. Fine, thin cracks often appear due to settling or minor shifts in the building. These can usually be repaired with joint compound and sanding. Ignoring these cracks can lead to more extensive damage over time. Typically found at corners or where walls meet ceilings. These are often due to settling and may require reinforcement with drywall tape. Addressing these cracks helps prevent further movement and damage. Often indicate more serious structural issues, such as foundation problems. These should be inspected by a professional to ensure the underlying cause is addressed. Ignoring these cracks could lead to significant structural issues. Surface damage usually caused by impacts from furniture or other objects. Shallow dents can be filled with spackle, while deeper ones might need joint compound and sanding. Repairing dents promptly prevents them from affecting the wall’s appearance. Result from leaks or high humidity. Stains can lead to mold growth if not addressed promptly, requiring a combination of repair and moisture control. Removing stains early prevents further water damage and health risks. Includes bubbling or warping of drywall due to prolonged exposure to moisture. This often necessitates replacing the affected drywall and addressing the source of the moisture. Moisture damage can lead to mold growth and structural issues if not handled properly. Caused by moisture issues or poor adhesion. This problem typically requires removing the damaged paint, repairing the underlying drywall, and repainting. Properly addressing peeling paint improves both the appearance and durability of the walls. Did you know that tree roots can cause cracks on your walls? Discover how to manage them with our latest blog, “Spring Lawn Care In Ontario, Canada – A Detailed Guide” Check it out for expert tips and solutions! What Are The Causes of Drywall Damage? Drywall damage can be attributed to various factors. Understanding these causes helps in both prevention and repair: As homes settle, minor shifts can create cracks in the drywall. This is common in newly constructed or older homes. Regular inspections can help detect and address settling-related issues early. Water leaks from roofs, pipes, or high humidity can lead to swelling, warping, and mold growth. Addressing moisture sources and ensuring proper ventilation is crucial to prevent drywall damage. Accidental impacts from furniture, toys, or other objects can cause dents, holes, or cracks. Using bumpers or protective covers can help minimize impact-related damage. Fluctuating temperatures can cause drywall to expand and contract, resulting in visible cracks or warping. Maintaining a consistent indoor temperature helps mitigate temperature-related issues. Inadequate installation practices, such as improper taping or insufficient joint compound, can lead to long-term problems. Ensuring high-quality installation practices can prevent future issues. Exposure to harsh chemicals or cleaners can damage the surface of drywall. Using mild cleaning products and protecting surfaces from chemical exposure helps maintain drywall integrity. Termites or other pests can cause damage to drywall, necessitating repairs and pest control measures. Regular inspections and pest control can help prevent damage from insects. Importance of Proper Drywall Repair for Home Maintenance Maintaining drywall in excellent condition is crucial for several reasons, especially for seniors: Well-maintained drywall not only looks better but also creates a more inviting and pleasant living environment. Proper repairs ensure that walls remain smooth and visually appealing. Timely drywall repairs help prevent minor problems from escalating into more serious structural issues. For example, a small crack can lead to more significant damage if not addressed promptly. Addressing moisture and mold issues related to drywall can prevent harmful spores from spreading. This is particularly important…
Read more
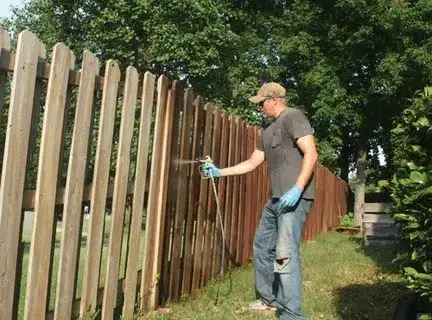
Fences are designed for two things, one is to keep you safe, and the other is to add an aesthetic appeal that enhances your home with class while giving it the privacy it requires. Your fence performs several functions. Always keep in mind that one of the best ways to make your fence look beautiful and last longer is to stain it. But how can you stain your fence? In this guide, we will give you some tips on how to do it correctly. Plus, we will tell you about all the advantages of staining a fence and how beneficial it can be to hire a professional deck and fence service in Mississauga, especially if you are someone older who needs extra help. 6 Environmental Benefits Of Staining A Fence In Mississauga Let’s explore these 6 environmental benefits of staining a fence in Mississauga to understand how it protects your wood, reduces waste, and enhances sustainability. Mississauga Weather Protection From rainy summer months to snowy winters, Mississauga has all the weather conditions. By sealing your fence, you will help provide a protective barrier against the sun and rain. Stain helps protect and seal the wood so that moisture will not penetrate, causing early rot or warp decay. Especially in Mississauga where winter and ice can be quite severe, and is that under these conditions, if you don’t stain your wood exterior it won’t last after a snowy season. In addition, staining also helps protect your fence from the damaging effects of sunlight during the summers. Over time, wood discolors and weakens due to UV radiation. If not treated with a professional-grade stain, weather damage can greatly reduce the strength and vitality of your fence. Regular staining keeps fences strong and beautiful year after year, helping Mississauga homeowners maintain their home’s curb appeal. In addition, staining helps protect your wood from the degrading effects of mold and mildew that can ruin a new fence. This extra layer of defense is essential to the durability of the fence and, in turn, can prevent you from needing a costly repair. Increased Aesthetic Appeal One of the most obvious reasons why you might consider staining a fence in Mississauga is the way it makes the appearance of your home more appealing. Staining your fence changes the appearance of the property by giving it a cleaner look and providing a better contrast. In a place like Mississauga, which is home to several neighbourhoods, each with its own style, a nicely stained fence will blend well with the architectural surroundings of the city, making your home stand out. Homeowners can choose the stain color and finish to customize the fence to achieve an aesthetic that meets the user’s preferences and complements their property. Whether you’re looking for a natural wood tone or something bolder as a statement color, stains offer a wide variety of colors and finishes. An attractive fence can also increase marketability, especially if you want to sell in an area where property values continue to rise, so fence staining is considered a smart investment. Well-constructed and Durable Staining your fence, will ensure it lasts much longer. Although the initial investment is quite high, the savings over time are considerable. Stained fences are less prone to damage, which translates to fewer repairs and replacements in the future. For homeowners, especially if they are seniors, staining offers a cost-effective alternative to property maintenance in an expensive city like Mississauga. Read more about Senior Summer Vacation: Tips, Tricks And Useful Ideas The best thing about using a stained fence is that it requires less maintenance, which means you’ll spend a lot less time and money eventually, which is beneficial for maintaining your budget. In addition, you ensure that you have a fence that is protected against the various Canadian weather conditions, which can be harsh on untreated wood. Staining also makes your fence last longer and is an environmentally friendly option. Fewer replacements, generate less waste, which is good for Mississauga’s green residents. Community and Local Value Mississauga is a city geared for community living, in that the way your home looks can affect neighborhood pride and value. Beyond improving your property look, staining a fence enhances the curb appeal of the street, which is a big plus for all homeowners on that same street. The best part is that this has a ripple effect, as you inspire your neighbors to invest in their homes by increasing the overall curb appeal of the entire neighborhood. And, it’s a win-win when all homeowners take pride in their neighborhoods, as well-kept properties attract other buyers and make homes more valuable. In addition, a good-looking, weather-resistant fence is key to maintaining neighborhood relationships. Homeowners who take pride in their homes will feel part of the neighborhood, which creates belonging and togetherness. Since Mississauga achieves the perfect balanced blend of diverse cultures, such a relationship is very beneficial. Easy Maintenance and Cleaning If you don’t dye your fence, it will be more difficult to clean and maintain. The stain acts as a protector, keeping foreign objects and dirt out of the wood. This makes cleaning low maintenance, with no need to do anything besides wash it with a little soap and water from time to time, this reduced labor is great for seniors. In a busy city like Mississauga, where time is often the most precious resource, convenience is what counts. Homeowners will spend less time keeping it looking good for their family and friends, while having the house spruced up to look spectacular from the outside. Because, maintaining a stained fence on a regular basis will prevent small problems from growing and becoming big ones. If you maintain a fence properly, not only will it further prolong its lifespan, but you’ll also keep its appearance at optimal levels. Green Dyes Are Good For The Environment Selecting eco-friendly dyes for a fence can take the environmental benefits of staining to another level. Most stains now offered in low VOC…
Read more
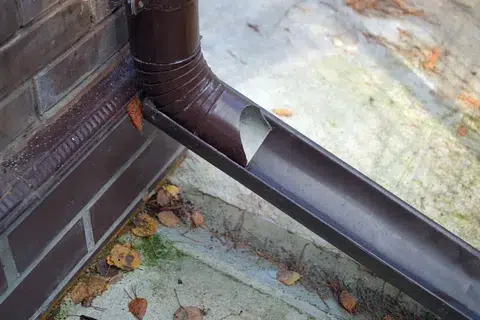
As a Mississauga resident, you know how necessary home maintenance is to get the most out of your home is no easy task. Maintaining your gutter downspouts is a crucial, yet often overlooked, task. If you’re wondering, ‘How Do I Unclog Gutter Downspout In Mississauga,’ it is important to address this issue to prevent water damage and ensure proper drainage. The process of unclogging your gutter downspout can be straightforward provided that you possess the necessary knowledge and skills. This guide will help you through tips on how to clean and unclog your gutter downspouts. However, if you are a senior citizen who needs help cleaning your downspouts, we will tell you the way so you can get help from professionals and what are the advantages of having them. Steps You Can Take to Unclog Your Gutter Downspout in Mississauga Maintaining your gutters and downspouts is crucial for preventing water damage to your home. Below, we outline essential steps you can follow to unclog your gutter downspout effectively. They provide a detailed, step-by-step guide to help you complete the task efficiently and safely. 1. Gather the necessary tools and safety equipment. Check to see if you have everything you require. You require a ladder, gloves, a garden trowel, a bucket under the downspout hole and a piece of hose with a spray nozzle that has power to clean it thoroughly. A plumbing snake is useful for clogged debris. In addition, you require safety equipment, such as goggles and a hard hat if it’s the first time you’re trying to do something like this, can also be helpful. Check that your ladder is on stable ground and has the proper height to reach the gutters comfortably. A pair of gardening gloves will keep you comfortable and safe from the occasional sharp debris, while a garden trowel is ideal for getting in there and pulling out leaves and other debris. The plumbing snake helps unclog stubborn clogs inside the downspout. The number one priority is always safety. And having someone there to steady the ladder while you work can provide an added measure of safety. 2. Inspect your downspouts Before you begin the cleaning process, do a thorough inspection of your downspouts. Watch out for puddles of water or slow drainage, these are signs of clogging and can cause your gutters to overflow. Carefully inspect for cracks, rust damage or loose supports that need to be addressed before cleaning begins. Inspecting your downspout can give you an idea of the severity of the blockage deep in your pipe. However, if they do appear to be relatively clean, a quick flush will suffice. Take note of the areas that will need the most cleaning work. This first look will help you approach it in the most efficient way. 3. Remove surface debris Start by removing visible dirt and debris at the top of your gutters. Climb up your ladder and carefully pick up leaves, twigs, or even dirt with a garden trowel or gloved hands. Doing this will help you determine if there are any bogs on the surface. Keep the area below clean by putting the debris in a bucket. If you take the time and care to do this, you won’t miss bits of debris that could clog the duct. When you come across some stubborn clumps, use the trowel to gently break them up. Repeat the above steps, cleaning along the entire length of the gutter and along the front and back edges. By rinsing these buildups away, you’ll be leaving a dirt-free area for your final rinse. Read more about Does Gutter Cleaning Include Downspouts? 3. Rinse the downspout After removing all the dirt and debris, turn on the hose to flush the downspout. Screw a spray nozzle onto the hose and put the line into the top of the downspout. Let the water run through the downspout to help remove any remaining dirt and small debris. Adjust the spray nozzle to a gentle level to avoid damaging the gutter. It is possible that there is a clog in the downspout when you see water puddling. When this happens, you need to use a plumbing snake to remove the blockage. This step is an essential part of regular maintenance, as it also helps to ensure that the water drains as intended. 4. Plumbing snake for stubborn clogs If flushing the downspout does not drain the water, you may need to use a plumbing snake. Insert the snake into the bottom of the downspout and slowly insert it upward, turning to break up clogs. Downspouts can be especially tricky, especially if they are long or have many bends, so a little patience is required. After all your gutters are clean and shiny, using a plumbing snake will make sure it stays that way. It can help you avoid water damage to your home and protect your foundation. 5. Flush and test the water flow. You have to flush the downspout one more time after applying the plumbing snake so that the remaining dirt can be completely removed. Hook your hose up to the base of the downspout and get the water flowing. Let the water flow through the downspout to check for any remaining clogs or signs of slow drainage. Use a gentle spray setting on your irrigation hose nozzle to avoid breaking your gutters Now, if the water flows easily there just clean out the downspout. If not, then you might just have to run the plumbing snake through this section a second time. Read also, How Long Does Gutter Cleaning Take 6. Perform a final inspection You need to conduct a walk around your home and look for any overlooked areas or areas of the house that don’t drain properly. Look for leaks or sinkholes in your gutters, which may require repair. This is also a good time to check to see if your gutters are securely attached to the house. Gutters that are loose can cause…
Read more